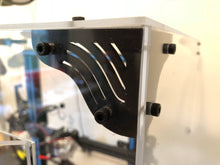
CR-10 Max Acrylic Enclosure Case Box Tent Kit
Regular price
$750.00
Sale
Creality had success with their huge CR-10 S5 printer, but apparently that was just a tad too large, so they created the slightly smaller CR-10 Max. This time, though they threw in bed leveling, put in a bed heater than covers the entire bed, updated the hot end to their most recent design, and made a bunch of smaller improvements.
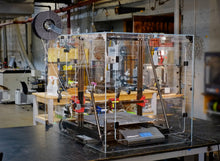
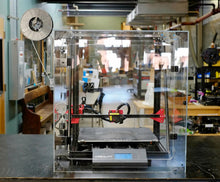
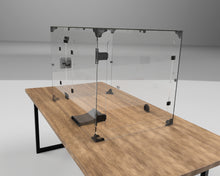
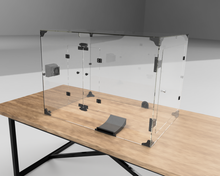
Even though the CR-10 Max is smaller than the S5 at a build volume of (450x450x470mm), it's still an enormous printer. This creates problems when designing an enclosure box because the same design that works for the much smaller CR-10S doesn't work here. For starters, the 1/8" acrylic isn't sturdy enough for a box that large, so we doubled its thickness to 1/4". This, unfortunately, raises the price of the acrylic, as well as the weight, but it is extra sturdy and durable for industrial and educational use. The enclosure comes flat packed, but it is still so large and heavy we have to build custom crates to make sure it gets to you safely.
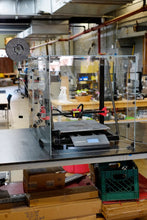
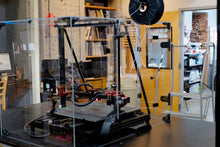
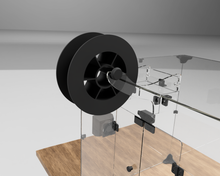
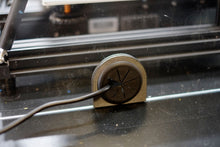
Another problem is the front is no longer a convenient way to feed filament since the printer is so deep. Instead, a side-door has been added at just the right location to be convenient. The filament feeds right through a slit in the middle of the two doors, and a side-top-mounted spool holder makes sure the filament goes into the extruder at the right angle.

To keep the electronics cool a custom vent has been added to the side. Together with the 80mm fan, a stream of cool air is brought into the electronics case where it is heated by the CPU board and power supply and then circulates through the case before exiting out of the back fan.
One of the challenges with a passively heated printer enclosure this large is managing the internal temperature. The temperature at the bottom of the enclosure isn't the same as at the top. Here's what you can expect with the two most common bed temperatures. Unfortunately, the CR-10 Max isn't great for ABS right out of the box. For example, the default plastic bed covering warps at 110C causing the bed leveling to fail. We upgraded to a steel bed plate. Another modification we like to do is upgrade the bed heater and then run it at higher temperatures up to 125C, or you can DIY a bathroom heater. Note that the later modifications are only suitable for a qualified electrician or electrical engineer.

Adding a 3DUPfitters enclosure provides many benefits:
- More flexibility to print different types of filaments, including ABS
- Better quality prints because the ambient temperature is controlled
- Fume filter to reduce smell or vent to the outside (sold separately)
- Quieter prints
- Sturdy, thick, high-grade acrylic doors for easy access
3D Print Your Own Connectors. Or Not.
A lot of customers prefer to print their own connector pieces themselves. We get it: you've got a great 3D printer, and it is itching to print things. No problem! The kit includes the STLs for all 3D printed parts. Typically it takes about 48 hours to print everything you'll need with a .4mm nozzle and .2mm layer height.
On the other hand, if you purchase the optional connector kit, all parts are 3D printed in the best quality American-made ABS. It not only will withstand the heat year after year, but it's also one of the most rigid plastics to add that will make the enclosure sturdier. We proudly use the best ABS filament you can buy from Atomic Filament in Indiana.
DON'T USE PLA!
If you still want to print your own parts, just remember that temperatures inside an enclosure will melt PLA, so you will get the best results with printing parts in a high-quality ABS, ASA, or Nylon. The catch-22 is you need an enclosure to print ABS! If you don't already have an enclosure, you can make do with PETG. Just keep in mind that PETG is more flexible and will make the entire enclosure less rigid than if you had used ABS.
Pro Quality American Made Acrylic
The panels are made in a factory in Ohio and cut on an American-built industrial laser, and then flat-packed for your assembly. All you need for assembly is just a hex wrench and a small Philips head screwdriver. (not included.)
Included in this Kit
- Outside dimensions 40" (Deep), 27" (Wide), 32" (Tall).
- Fits the CR-10 Max
- Custom designed acrylic side spool holder.
- Acrylic front panel with frame, doors, injection-molded hinges, magnetic latch, custom-designed latch mount in ABS, steel strike plates, and matching screws.
- 5V 80x80mm fan. (3D print a cover if you don't wish to vent.)
- 6mm clear acrylic panels. There is no bottom.
- 140 screws, nuts, bolts, hinges, and miscellaneous parts.
Add-ons Sold Separately
- 3D Printer NOT INCLUDED
- 3D printed parts unless specified
- Upgrade to an active charcoal filter and fan to reduce fumes.
- Upgrade the plastic knob to knurled steel.
- Put your logo on the front or sides!
- The outside venting system will send potentially dangerous and definitely odorous fumes outside. We supply the fan and 4" dryer hose adapter, you get the rest of the parts from your local hardware store.
- Interior LEDs (as pictured in the wood & acrylic version renderings) will make it easier to see prints inside the wood version.
- Temperature gauge
- Want something different? Request a custom modification.
The Installation Manual is at the top of the non-fiction bestseller list.


